Tuesday, 25 November 2008

Tool of the week!

Hmmm, maybe "of the week" is somewhat optimistic, going on past progress! ;-) So I present Tool of the Month:

De-burring Tool

Yes, the de-burring tool, used to (wait for it) remove burrs. In common with many tools using it is an acquired skill, and I should have achieved an acceptable level of competence in another 2-3 builds time. ;-)

  • Progress: floor drilled & de-burred
  • Plans: riveting the floor on then flipping the whole thing back right-side-up!

Sunday, 22 June 2008

Catch Up Blog - May.

Having got the marked out floor panel back to the CMF, it was cut out using a jigsaw and the rough edges filed until smooth.

Then is was loaded onto the CTV (now the Component Transfer Vehicle), and delivered to the VAB where it was clamped to the Rocket chassis.

The next step is to buy a compressor and some air tools to do the drilling and riveting.

The search for a suitable donor vechile is also underway but contary to everybodies belief, a 1.6 Category D Focus is not that easy to find.

Sunday, 4 May 2008

Catch-up Blogs - 20th - 26th April

After my accident when I was attacked by the front hub (who left that hanging from the roof?) and saw stars for a few days, I finally remebered that I am supposed to be writing a blog.

So, where were we?

Having painted the front hubs and finished building the suspension units we decided the chassis would be easier to work on if it was raised up a couple of feet. A hunt round the garage, or CMF (Component Manufacturing Facility) produced a lot of old wood and a frame was fairly quickly built. Continuing our NASA analogy it was named "The Crawler" and casters added to make it movable.

Then it was mounted on the CTV (Crawler Transportation Vehicle) and taken to the VAB.

Before the Rocket could be positioned, the floor panel had to be marked out ready for cutting back at the CMF.

Here we see an engineer skillfully marking the panel..

Sunday, 20 April 2008

We haven't stopped!

Hi all/both,

this week's theme is "parts that stop the wheels from falling off". First up we have a sample of the completed suspension bushes. Cliff may need to re-mount his vice, but otherwise I think everyone got through the whole lot unscathed. If only we could say the same for the next step!

Here is one of the uprights dad was cleaning in the last update, after brushing and Hammerite-ing (other direct-to-rust paints are available). It's just hanging around drying off, out of the way... or so we thought! If you look closely you might spot traces of blood on it! Yes, dad has managed to get run over already, and we barely have any parts together yet!

Hopefully he'll be along soon with another exciting update, assuming that he's stopped seeing stars!

  • Progress - All suspension bushes complete, uprights cleaned and painted
  • Plans - Dad's secret project, buying some nuts & bolts

Monday, 7 April 2008

The clean up begins....

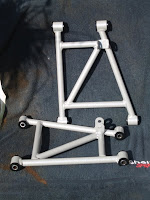
As Tom will be bringing the completed suspension arms at the weekend, I thought I'd better clean the front uprights and steering rack. These are some of the second hand, or "classic" as we prefer to call them, parts used in the build. Next the uprights will be wire brushed and painted and the rack relubricated and fitted with new gaitors and track-rod ends.